

How to Setup WordPress Coding Standards in phpStorm with PHP Code Sniffer (Mac)
As developers, it is our job to deliver state-of-the-art applications for our clients. Doing this in a timely manner can sometimes be difficult, which is why we are always trying to optimize our workflows. Often, we need to combine multiple technologies to make the experience unforgettable for the end user which consumes a fair amount of our time. During this process, one thing that is easy to overlook is perfecting our syntax for future developers of the project.
But hey, who has time? Lucky for you, we’re here to help! If you setup your environment the way outlined in this post, we all have the time. Once setup, you can format your code however you are most efficient – press [CMD + OPT + L] – and BAM! Your code is formatted to WordPress coding standards with the assistance of phpStorm.
1. Requirements
First things first, you will need phpStorm. phpStorm varies in price, but as of the writing of this post you can either purchase it yearly for $199, or monthly for $19.90. If you are on the fence about purchasing, they also offer a free 30 day trial, which will still work with this post.
2. Installing phpStorm
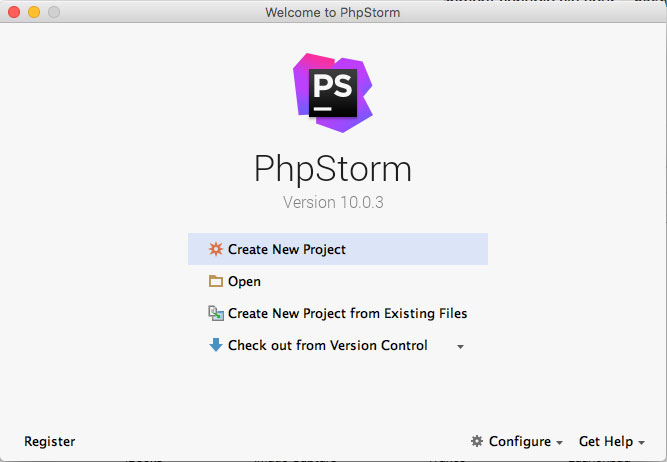
Download and install phpStorm. If you already have phpStorm installed, skip to the next section of this post. The first time you launch phpStorm, you will probably see this screen:
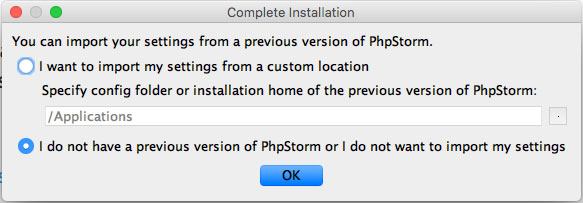
Select the second option, click OK. A license screen will pop up. Click “Evaluate for free for 30 days”, or enter your license information from your purchase order. Accept their agreement if prompted. Lastly, you will be presented with this screen:
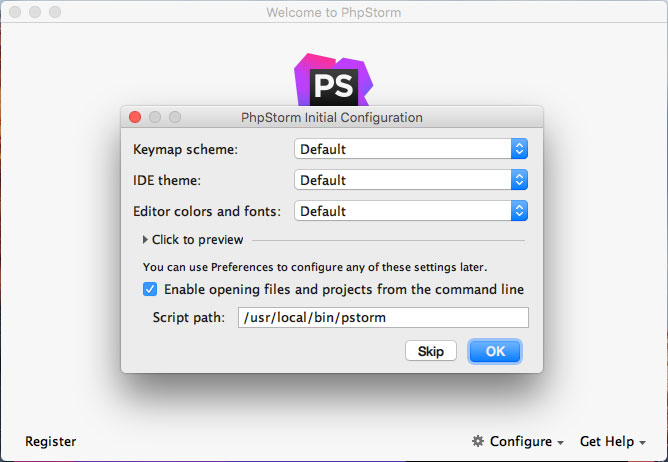
Leave everything as-is and click OK. If any other screens pop up asking for permission, enter your password.
3. Setting up phpStorm WordPress environment
Open up phpStorm. In the menu bar, click on phpStorm -> Preferences. In the sidebar of the window that pops up expand Editor -> Code Style -> PHP. Set the predefined style to WordPress by clicking on Set from -> Predefined Style -> WordPress as shown in the screenshot below:
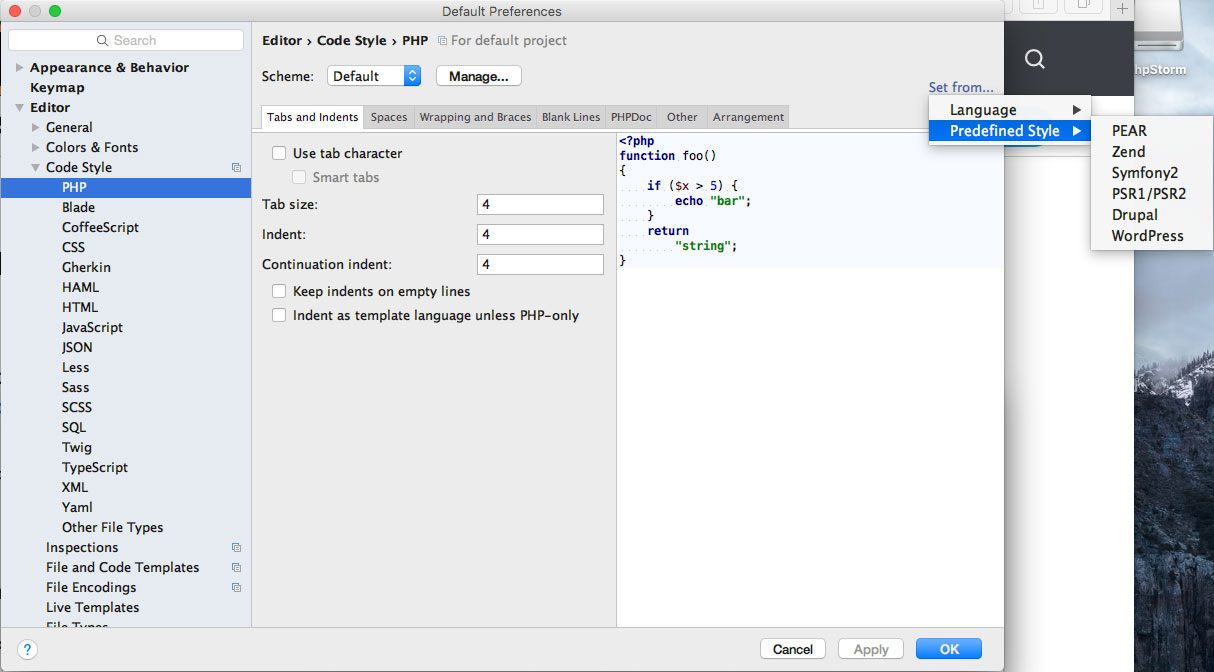
Once WordPress is selected, click Apply, click OK.
4. Open Terminal
In the default menu bar click on Go -> Utilities. Open the Terminal application located in this folder. This should bring you to the command line.
5. Make sure Pear is installed
Pear is required to run the code sniffer we will install in the next step, so let’s make sure it is installed. At the command line, enter:
pear
If you see a list of commands that are available, then Pear is already installed so you can skip to the next section of this post. If you see “command not found”, then we need to install Pear by doing the following:
sudo curl -O http://pear.php.net/go-pear.phar
sudo php -d detect_unicode=0 go-pear.phar
This should present a screen similar to what you see below:
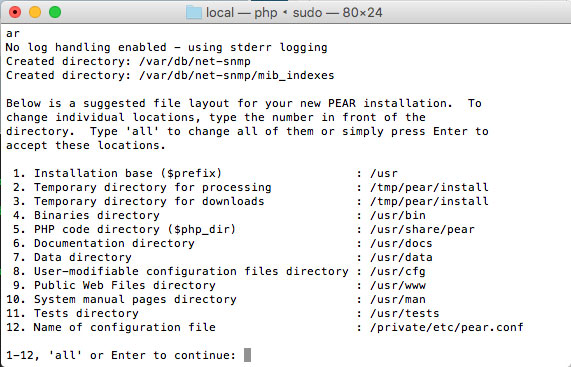
Type 1, press enter. Enter the following:
/usr/local/pear
Press enter. Type 4, press enter. Enter the following:
/usr/local/bin
Press enter twice. Pear is now setup.
6. Installing the PHP Code Sniffer
The PHP Code Sniffer will be used to connect Pear to our WP Coding Standard which also connects to phpStorm. From the command line run:
sudo pear install PHP_CodeSniffer
Enter your password. This will install PHP CodeSniffer, but it may have some permission issues, which we want to fix immediately. Run these 3 commands (enter your password if prompted):
sudo mkdir -p /Library/Server/Web/Config/php
sudo touch /Library/Server/Web/Config/php/local.ini
echo 'include_path = ".:'`pear config-get php_dir`'"' | sudo tee -a /Library/Server/Web/Config/php/local.ini
The PHP CodeSniffer is now setup.
7. Download the WordPress Coding Standards
These WordPress coding standards are provided by Gary Jones and Weston Ruter via Github. At the command line, run these two commands:
cd ~/Documents
git clone -b master https://github.com/WordPress-Coding-Standards/WordPress-Coding-Standards.git wpcs
If a screen pops up after running this command regarding command-line tools, click install. Accept the license, wait for the install to be done, and re-run the command above.
Since I do not know the username of your computer, and I want to make sure you get this installed properly, at the command line run:
pwd
Copy and paste the path into this text box:
This last command is the most important. If you do not see anything in the box below, it is because you skipped a step. Enter the path of pwd in the above text box to generate this special command specifically for your computer.
sudo phpcs --config-set installed_paths PATH_FROM_INPUT_BOX/wpcs
To verify that the WordPress coding standards have been added properly, run this command:
phpcs -i
You should see WordPress in the list. If you do not, the Code Sniffer cannot find your WP coding standard, repeat step 7.
8. The power of phpStorm!
With phpStorm open, navigate to phpStorm -> Preferences. In the sidebar of the window that pops up expand Languages & Frameworks -> PHP -> Code Sniffer.
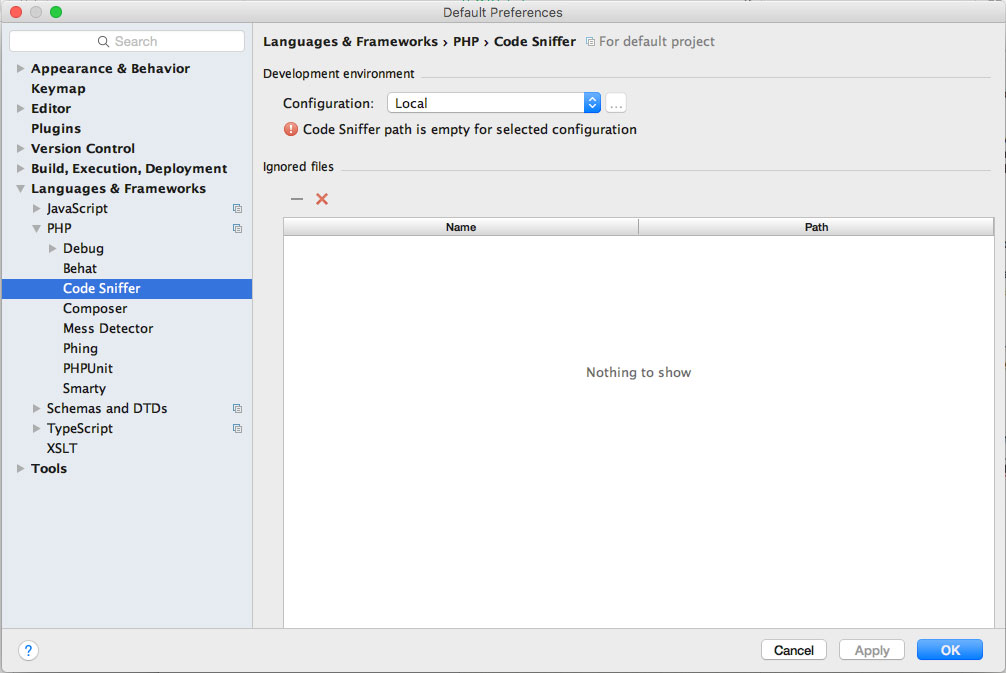
Click the […] button next to the dropdown. Update the Code Sniffer path to /usr/local/bin/phpcs. Click the validate button as shown in the screenshot below:
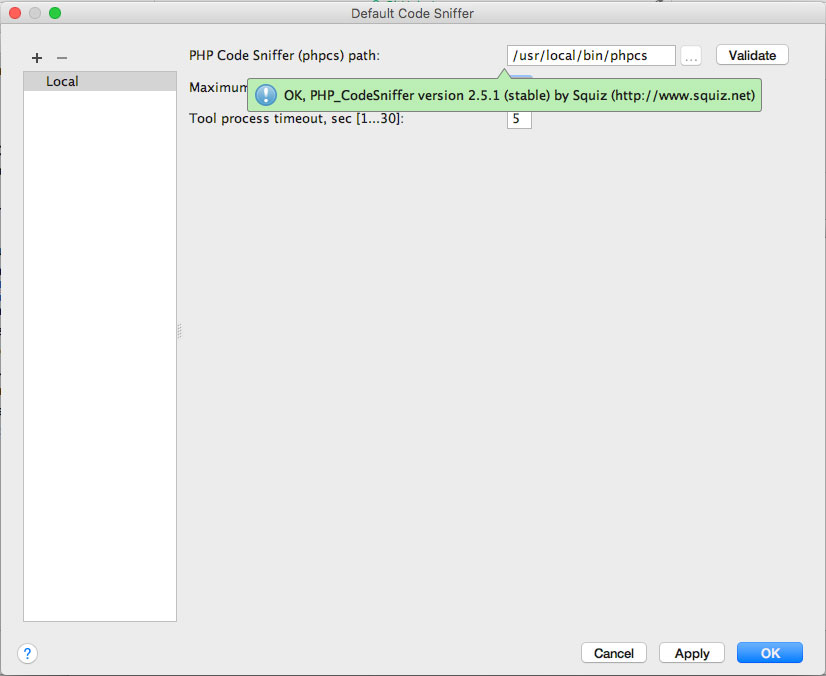
Click Apply. Click OK.
Now, navigate in the sidebar again to Editor -> Inspections. In the middle column, expand PHP. Check the box next to PHP Code Sniffer Validation.
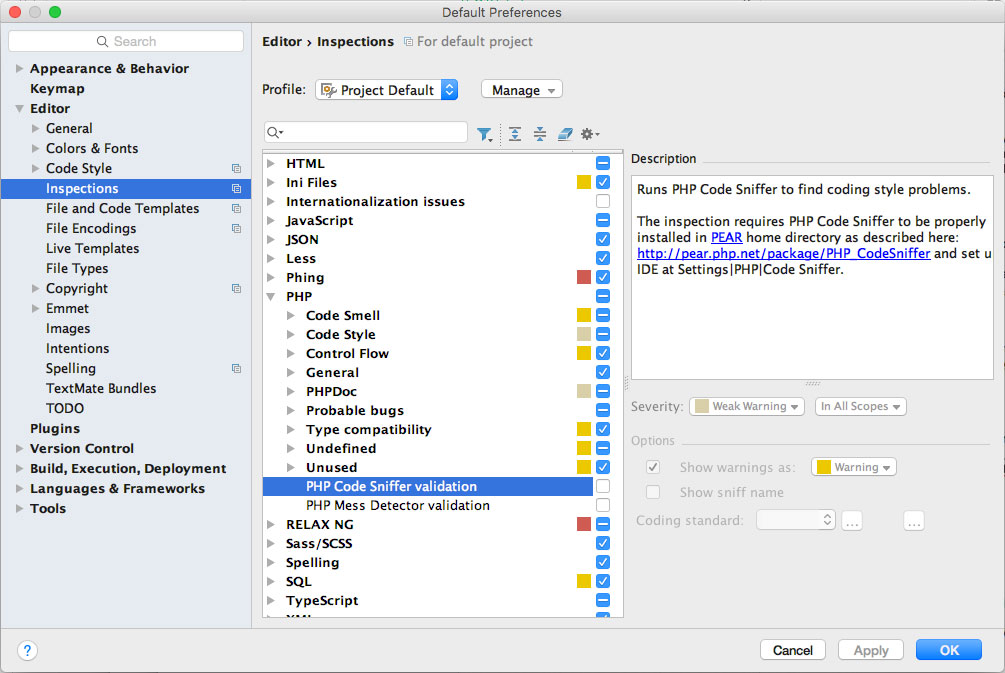
The far right column will allow you to interact with it now. Select the […] button, and you should get a message that the coding standards were updated. Select WordPress from the dropdown. Click Apply. Click OK.
Congratulations! Your phpStorm is optimized for writing WordPress compliant code.
Hopefully this article helped you with an installation that can be somewhat frustrating. If you have any questions or concerns, please contact us or email me directly at travish@westwerk.com!
